In this tutorial I will discuss WPF custom commands and how to pass parameters to it. The sample used will be simple to understand and relate to. I will not be going into the deep gory details. Just a gentle push which I am sure will be enough to set you off on the slippery slope which is WPF. How come things which are beautiful are also cruel. Anyways I digress.
As usual I will start off by WHY and then HOW. It will be mighty useful if you go through this post where I discussed how to use the built in WPF commands. And as noted in that post too, If you want to save time and your sanity, use FODY Commander instead.
WHY
My previous post discusses this in detail. But what about custom commands? Whenever the built in commands are not sufficient for you, then you have to go the WPF custom commands way. But before you do so, do make sure that you really cannot get the job done using the already provided commands.
HOW
Well this will be a bit more involved. What I will do is to create a custom command first.
Lets start off with class containing the custom command, imaginatively names CustomCommands.cs
using System.Windows.Input;

namespace CustomCommandsDemo
{
    public class CustomCommands
    {
        private static RoutedUICommand _submit;

        static CustomCommands()
        {
            _submit = new RoutedUICommand("Submit", "Submit", typeof(CustomCommands));
        }

        public static RoutedUICommand Submit
        {
            get { return _submit; }
        }
    }
}
Let us look at some important steps.
- Line 07 : We define private field of type RoutedUICommand.
- Line 14 : We declare the property which returns the private field.
- Line 11 : In the constructor of the CustomCommands class we create an instance of the RoutedUICommand. We will keep it simple and just supply the what is needed. You can add gestures which means that you can execute the command using keyboard shortcuts too. But I will not add them since we are going to pass parameters to the command also. More on that later. Command Name, Command Text and the owning type is what I am supplying.
Now let us see the code behind for the MainWindow.xaml.cs
namespace CustomCommandsDemo
{
    public partial class MainWindow : Window
    {
        public MainWindow()
        {
            InitializeComponent();
            CommandBinding binding = new CommandBinding(CustomCommands.Submit);
            binding.Executed += SubmitCommand_Executed;
            binding.CanExecute += SubmitCommand_CanExecute;
            CommandBindings.Add(binding);
        }

        private void SubmitCommand_CanExecute(object sender, CanExecuteRoutedEventArgs e)
        {
            e.CanExecute = !string.IsNullOrWhiteSpace(UserName.Text) && !string.IsNullOrWhiteSpace(Password.Text);
        }

        private void SubmitCommand_Executed(object sender, ExecutedRoutedEventArgs e)
        {
            var values = (object[])e.Parameter;
            string value = "User name is : " + (string)values[0] + " and Password is: " + (string)values[1];
            MessageBox.Show(value);
        }
    }
}
Let us have a look at the important steps.
- Line 08 : We create a CommandBinding object using our custom command as a parameter.
- Line 09 : We initialize the Executed field of this object with the method we want to run when the command is executed.
- Line 10 : We initialize the CanExecute field of this object with the method we want to run to find if the command is to be enabled in first place.
- Line 11 : We add the object to the CommandBindings.
- Line 14 : This is the method which will be used to determine if the command is to be enabled or disabled.
- Line 16 : The logic which decides if the command is to be enabled. Here the submit button will remain disabled till data is filled in the Username and Password field. The CanExecute field of the CanExecuteRoutedEventArgs decides the state of command.
- Line 19 : The function which will be run when the command is executed.
- Line 21 : I know I will be passing two parameters to this command from the XAML. Hence I will cast it to an array of Objects.
- Line 22 : I will cast my way through it. See the hard coding of the array indices. Bad boy. But then this is a demo.
- Line 23 : Ultimate treason. The usename and password get displayed !! Again, this is a demo.
Before we jump to the XAML file there is this little thing we have to take care of. Here is the file called ParameterConverter.cs. I will be passing parameters to the custom command I have created. This requires MultiBinding. And MultiBinding needs IMultiValueConverter.
using System;
using System.Globalization;
using System.Windows.Data;

namespace CustomCommandsDemo
{
    public class ParameterConverter : IMultiValueConverter
    {
        public object Convert(object[] values, Type targetType, object parameter, CultureInfo culture)
        {
            return values.Clone();
        }

        public object[] ConvertBack(object value, Type[] targetTypes, object parameter, CultureInfo culture)
        {
            throw new NotImplementedException();
        }
    }
}
So what is the deal?
Why we need Multibinding?
We need multibinding because we want to send two parameters to our command. But if you see the command function you will see that it gets an object of ExecutedRoutedEventArgs. This object contains a “single” field called “Parameter”. So we need to somehow combine the two parameters into one single parameter. And this is what MultiBinding does. Allows you to combine multiple values into a single value.
Why we need IMultiValueConverter?
First you need to be familiar with converters. I will not go into details. Maybe a post later. MultiValueConverters take an array of values instead of a single value which normal converters take. If you look at the Convert method, you will see that it is passed an array of values. And it returns a clone of them. This is what the Parameter field of the command will get.
But why it clones?
Convert function runs when the bound values change. After the convert function runs the value array gets reset to null. Unfortunately the command parameter is fetched when you execute the command. So at that time the values you will get will be null. Hence the clone method to make sure that you get the return value of the convert function when convert method ran.
Now we will have a look at the XAML, the MainWindow.xaml
<Window x:Class="CustomCommandsDemo.MainWindow"
        xmlns="http://schemas.microsoft.com/winfx/2006/xaml/presentation"
        xmlns:x="http://schemas.microsoft.com/winfx/2006/xaml"
        xmlns:src="clr-namespace:CustomCommandsDemo"
        Title="MainWindow" Height="250" Width="450">
    <Window.Resources>
        <src:ParameterConverter x:Key="Conveter" />
    </Window.Resources>
    <Grid>
        <TextBlock HorizontalAlignment="Left" Margin="47,53,0,0" TextWrapping="Wrap" Text="User Name" VerticalAlignment="Top" Height="21" Width="68" />
        <TextBox Name="UserName"
                 HorizontalAlignment="Left" Height="21" Margin="138,53,0,0" TextWrapping="Wrap" VerticalAlignment="Top" Width="179" />
        <TextBlock HorizontalAlignment="Left" Margin="47,107,0,0" TextWrapping="Wrap" Text="Password" VerticalAlignment="Top" Height="18" Width="68" />
        <TextBox Name="Password"
                 HorizontalAlignment="Left" Height="23" Margin="138,104,0,0" TextWrapping="Wrap" VerticalAlignment="Top" Width="179" />
        <Button Name="SubmitButton" Content="Submit"
                Command="src:CustomCommands.Submit"
                HorizontalAlignment="Left" Margin="138,168,0,0" VerticalAlignment="Top" Width="179">
            <Button.CommandParameter>
                <MultiBinding Converter="{StaticResource Conveter}">
                    <Binding Path="Text" ElementName="UserName" />
                    <Binding Path="Text" ElementName="Password" />
                </MultiBinding>
            </Button.CommandParameter>
        </Button>
    </Grid>
</Window>
Now this usually is simple but I will be passing parameters to this command. Hence Multibinding makes its grand entry. Let us look at the important steps.
- Line 04 : We include the proper namespace so that command and converter are available.
- Line 07 : Add the ParameterConverter to the Resources and define a key for it.
- Line 11 : Give a name to the User Name TextBox so that later we can bind to it and pass its value to our custom command.
- Line 14 : Give a name to the Password TextBox so that later we can bind to it and pass its value to our custom command.
- Line 16 : We create a Submit button.
- Line 17 : Our custom command attached to the button. Woo hoo.
- Line 19 : Time to pass parameter to our custom command.
- Line 20 : Converter in action.
- Line 21 : Binding the Text of the UserName textbox.
- Line 22 : Binding the Text of the Password textbox.
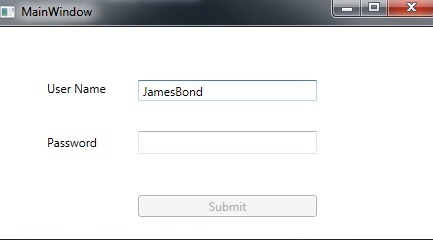
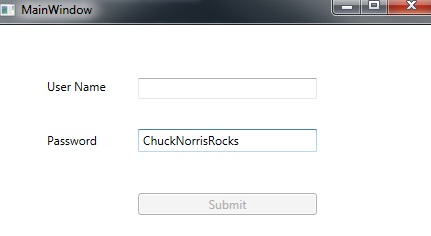
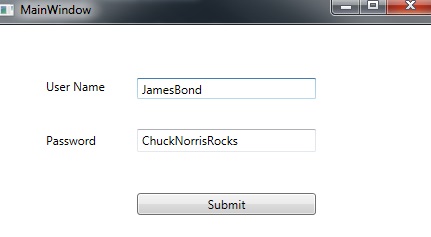
That is it. Your shiny new command ready to do your bidding. Run the code and you will notice that the submit button is not enabled till we put some text in both user name and password box. This is due to the logic which we wrote in “SubmitCommand_CanExecute” part of our custom command.


Once we put data in user name and password box you can click the submit button.

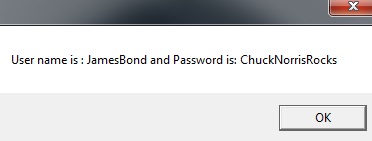
The program rather mischievously shows the user name and password.

The command got the user name and password from the parameters it was passed. Woo hoo.